
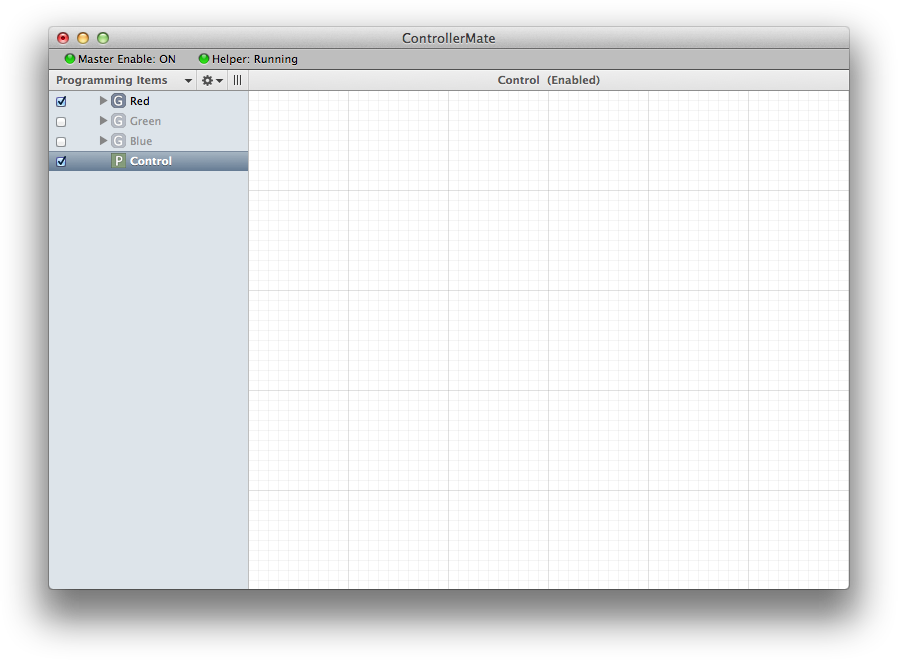
Multiple Programming Sets
The goal of this example is to demonstrate how to enable or disable various portions of ControllerMate's programming using building blocks. This assumes that the reader is familiar with the basics of creating Building Blocks as shown in the Detailed Tutorial.
This example will switch between three sets of programming using two buttons on the SteelSeries World of Warcraft MMO Gaming Mouse. One button will act as a "Next Programming Set" button, the other will act like a "Previous Programming Set" button.
One strategy for creating multiple programming sets in ControllerMate is to create a Group or a Page to contain each set of programming, then use Properties building blocks to enable and disable the groups and pages as necessary. This example will use one group for each set of programming, and will use a Counter building block to determine which group should be enabled.
The first step is to create three groups, each group will define one of the programming sets. Name the groups "Red", "Green", and "Blue".
Disable the "Green" and "Blue" groups. This will leave "Red" as the only active group when ControllerMate starts up.
Next, create a new page named "Control". This page must not be inside any of the programming groups.
On the "Control" page, create Button building blocks for the two mouse buttons that will select the current programming set.
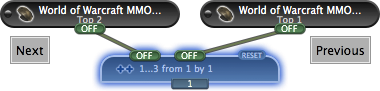
Next, create a Counter building block. Connect the output of the "Next" button to the "+" input of the Counter block. Connect the "Previous" button to the "–" input of the Counter block.
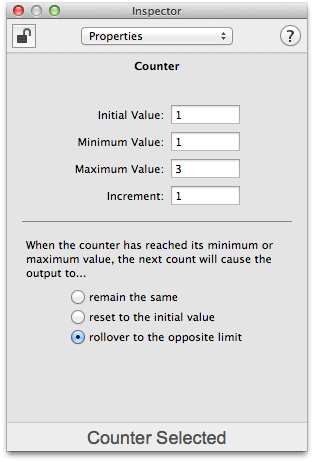
Configure the Counter block to have an Initial Value of "1", a Minimum Value of "1", and a Maximum Value of "3". The output value of the Counter block will select the programming set that is currently active.
When the buttons on the top of the mouse are pressed, the output of the Counter building block will iterate through the values "1", "2", and "3".

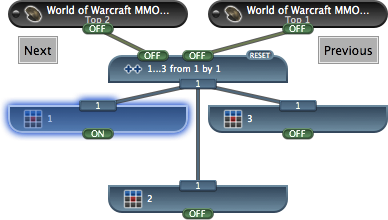
Next, connect three Value Selector building blocks to the Counter building block. Configure each Value Selector block to detect one of the values that the Counter building block creates.
When the buttons on the top of the mouse are pressed, the outputs of the Value Selector building blocks will turn ON and OFF as the Counter building block's value changes.
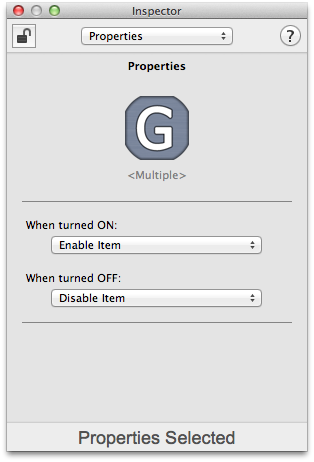
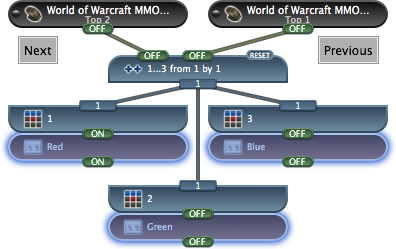
Next, create one Properties building block for each of the programming groups and connect them to the Value Selector building blocks.
Configure each Properties building block to enable its item when its input is turned ON, and disable its item when its input is turned OFF.
A pre-configured Properties building block can be created by dragging an item from the list of Programming Items onto a Page's grid.
When the buttons on the top of the mouse are pressed, the "Red", "Green", and "Blue" groups will be enabled and disabled as the buttons on top of the mouse are pressed. Any programming that the groups contain will be enabled or disabled as well.
At this point, completely independent sets of programming can be added to the three groups. One set at a time will be active based on which group is currently enabled. This setup can be extended by adding additional groups, adjusting the Maximum Value of the Counter block to match the number of groups, and adding additional pairs of Value Selector and Properties building blocks.
The drawback with this setup is that there is no feedback to indicate which set of programming is being selected when one of the buttons is pressed. This setup can be extended to provide audible feedback when the current selection changes.
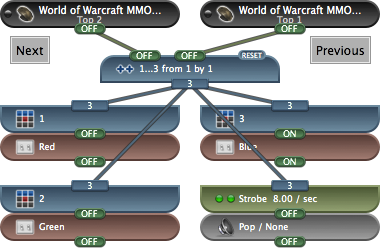
One option is to connect a Strobe building block and a Beep building block to the Counter building block. The example to the right will play the sound "Pop" once when the "Red" group is selected, twice when the "Green" group is selected, and three times when the "Blue" group is selected.
The rate at which the Strobe building block turns its output ON and OFF can be adjusted to control how quickly the "Pop" sounds are played.
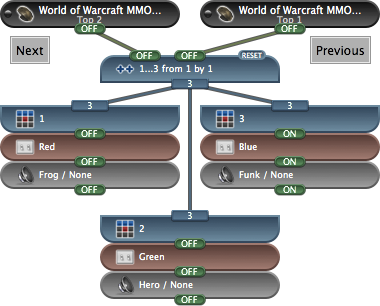
Another option is to add a Beep building block to each Properties block to play a unique sound when a group is enabled.
A unique option for the World of Warcraft MMO Gaming Mouse is to customize the mouse's LED when a group is selected. A Driver Configuration for the World of Warcraft MMO Gaming Mouse contains settings for the LED's color, pulse effect, and intensity. When the group containing the driver configuration is enabled, the settings for that configuration will be applied to the mouse.
In each group, create a driver configuration for the MMO Gaming Mouse.
Set the LED color, pulse effect, or intensity in each configuration to be used to indicate when the enclosing group is enabled.
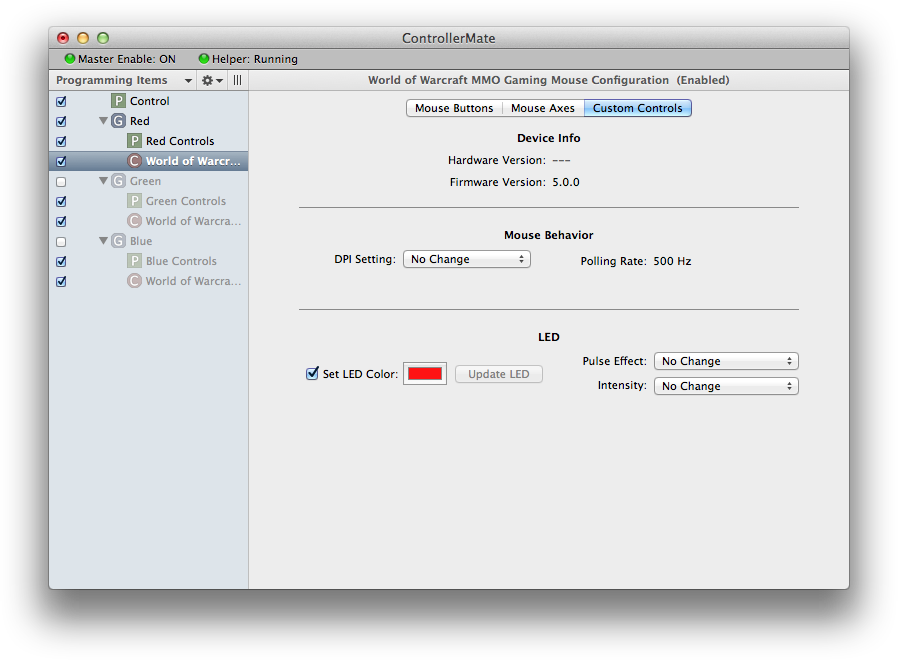
In the example above, the driver configuration sets the mouse's LEDs to red when the "Red" group is enabled.