
Joystick Mouse
The goal of this example is to demonstrate how to use joystick axes to control the cursor using a Virtual Mouse. This assumes that the reader is familiar with the basics of creating Building Blocks as shown in the Detailed Tutorial.
This example will use the mini-joystick on the CH Products CH Pro Throttle USB to control a virtual mouse.
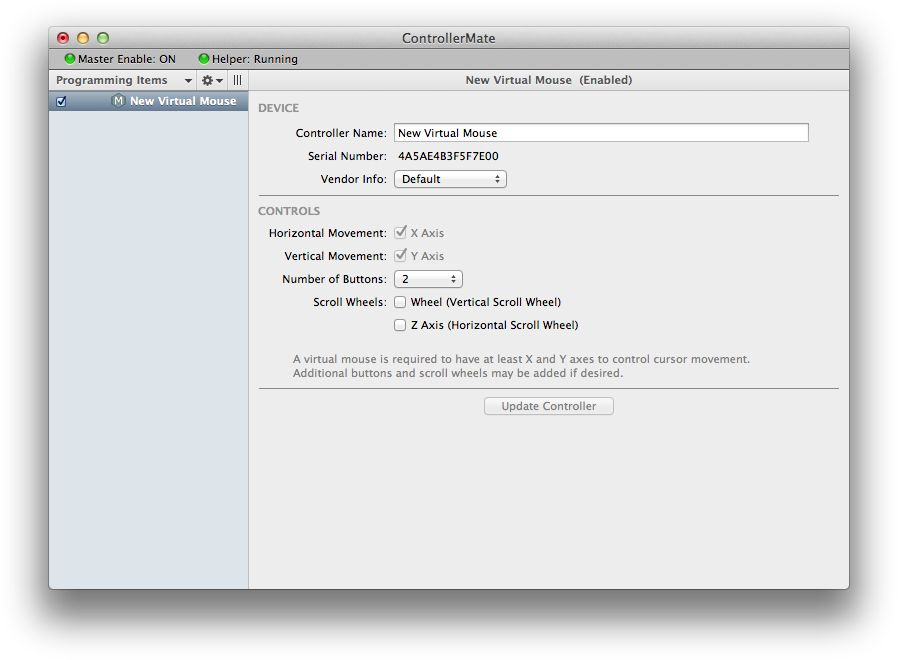
The first step is to create a new virtual mouse.
Right-click in the list of Programming Items and select Create Virtual Device ‣ Virtual Mouse.
The default settings for the new virtual mouse will be sufficient for this example.
The next task is to use the values from the mini-joystick on the CH Pro Throttle USB to create values for the axes on the virtual mouse.
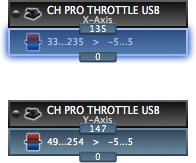
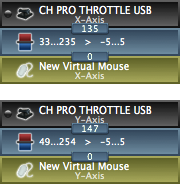
Create Axis building blocks for the X-Axis and Y-Axis on the CH Pro Throttle USB.
Connect an Axis Calibration building block to each Axis building block.
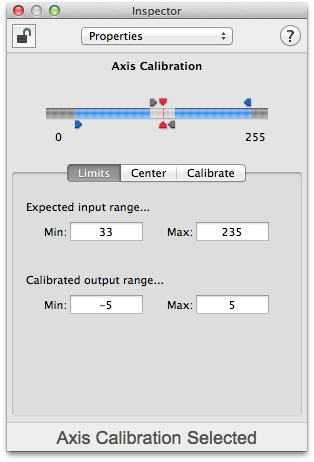
Move the mini-joystick on the CH Pro Throttle USB to determine the minimum and maximum values that its axes generate. Set the Min and Max values of each Axis Calibration block's Expected input range values that the attached axis generates.
Set the Min and Max values of the Calibrated output range to "–5" and "5" respectively.
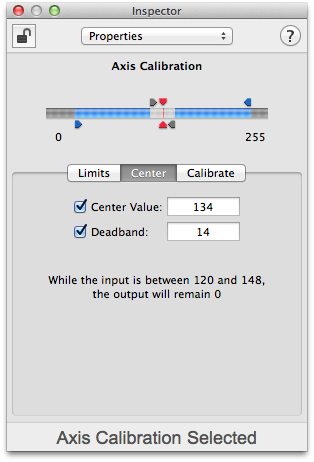
Set the Center Value of each Axis Calibration block to the value that each axis generates "0" when it is not being pushed.
Adjust the Deadband value of each Axis Calibration block to set the distance that the mini-joystick needs to move before the output of the block changes from "0" to another value. This is the point at which the cursor will start moving on the screen when the virtual mouse axes are connected to the Axis Calibration blocks. A joystick that has a firm feel and a repeatable center value can use a smaller deadband value. A joystick that has a loose feel will likely need a larger deadband value.
At this point, let the mini-joystick return to its center point and verify that the output values of the Axis Calibration building blocks are both "0". If the blocks have any other output value, the cursor will move on the screen when the virtual mouse is attached. In the worst case, the cursor could be uncontrollable.
If the output value of either Axis Calibration block is not "0" when the joystick is centered, double-check the settings of the Axis Calibration blocks as described above before connecting the virtual mouse.
The next step is to connect the virtual mouse to the Axis Calibration building blocks.
Create Virtual Axis building blocks for the X-Axis and Y-Axis on the virtual mouse and connect them to the corresponding Axis Calibration building block.
At this point, moving the mini-joystick on the CH Pro Throttle USB should cause the cursor to move on the screen. Just as importantly, when the mini-joystick is released, the cursor should stop moving.
If the cursor is too slow or too fast when the mini-joystick is pushed, then the speed of the cursor can be adjusted using two methods. The first speed adjustment is to change the values produced by the Axis Calibration building blocks:
- Disable the page containing the building blocks.
- Change the Min and Max values of the Calibrated output range of the Axis Calibration building blocks to larger values to increase the speed of the cursor, or to smaller values to decrease the speed of the cursor. The Min and Max values should always be the same number, with the Min value being negative and the Max value being positive.
- When the Axis Calibration building blocks have been adjusted, move the mini-joystick to verify that the output values on the Axis Calibration blocks change when the joystick moves, and then return to "0" when the joystick is released.
- After verifying that the output values of the Axis Calibration blocks return to "0" when the joystick is centered, re-enable the page containing the building blocks. Test the speed of the cursor and make further changes to the Axis Calibration blocks if desired.
The second speed adjustment is to use a Driver Configuration with a custom mouse acceleration curve:
- Disable the page containing the building blocks.
- Change the Min and Max values of the Calibrated output range of the Axis Calibration building blocks larger values to "–40" and "40" respectively. These values will give the best results when using a driver configuration.
- When the Axis Calibration building blocks have been adjusted, move the mini-joystick to verify that the output values on the Axis Calibration blocks change when the joystick moves, and then return to "0" when the joystick is released.
- After verifying that the output values of the Axis Calibration blocks return to "0" when the joystick is centered, re-enable the page containing the building blocks.
- Create a driver configuration for the virtual mouse and adjust the acceleration curve for a faster or slower mouse as described in the Mouse Acceleration example. The procedure for a virtual mouse is exactly the same as for a physical mouse.
In addition to controlling the cursor with the mini-joystick, the CH Pro Throttle USB can also be configured to trigger buttons on the virtual mouse.
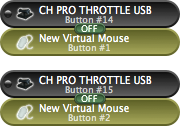
Create Button building blocks for two of the buttons on the CH Pro Throttle USB.
Connect Virtual Button building blocks for Button #1 and Button #2 on the virtual mouse.
At this point, the CH Pro Throttle USB can be used to control the axes and buttons of the virtual mouse.