
Hatswitch Mouse
The goal of this example is to demonstrate how to use a joystick hatswitch to control the cursor. This assumes that the reader is familiar with the basics of creating Building Blocks as shown in the Detailed Tutorial.
This example will use the hatswitch on the CH Products CH Pro Throttle USB to control a Virtual Mouse. The hatswitch on this device produces the following values:
| Hatswitch Position | Hatswitch Value |
|---|---|
| Center | 0 |
| Right | 1 |
| Down-Right | 2 |
| Down | 3 |
| Down-Left | 4 |
| Left | 5 |
| Up-Left | 6 |
| Up | 7 |
| Up-Right | 8 |
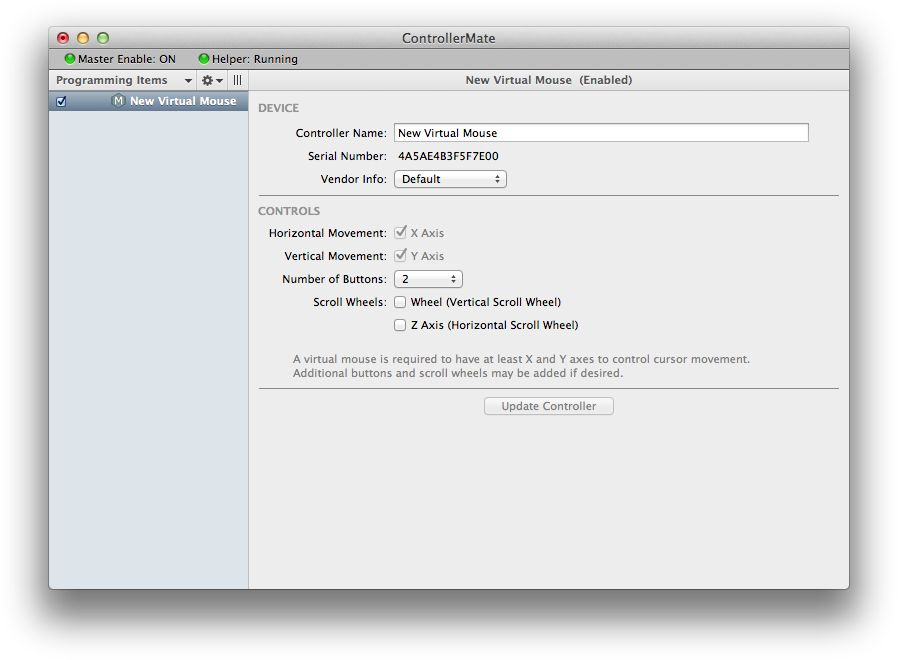
The first step is to create a new virtual mouse.
Right-click in the list of Programming Items and select Create Virtual Device ‣ Virtual Mouse.
The default settings for the new virtual mouse will be sufficient for this example.
The next task is to use the values from the hatswitch on the CH Pro Throttle USB to create values for the axes on the virtual mouse. Create four Value Selector building blocks and connect them to Hatswitch building blocks.
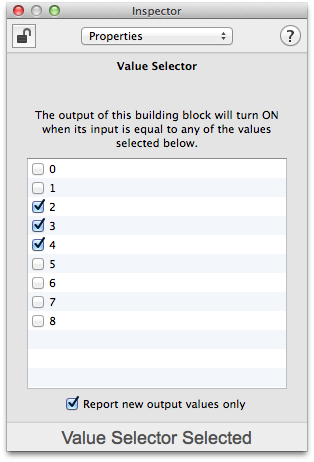
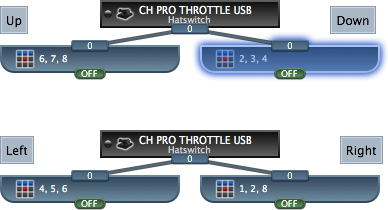
Each Value Selector block is configured with the hatswitch values for one direction on each axis. The Value Selector will turn its output ON when the hatswitch produces any one of these values.
For example, the highlighted Value Selector block to the right will turn its output ON when the hatswitch is pushed straight down or diagonally down.
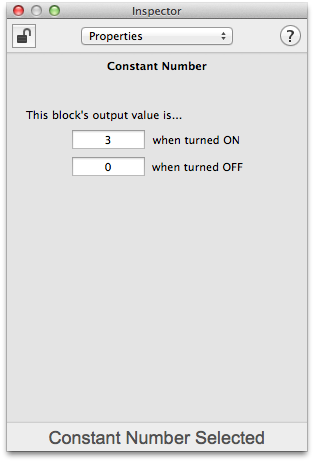
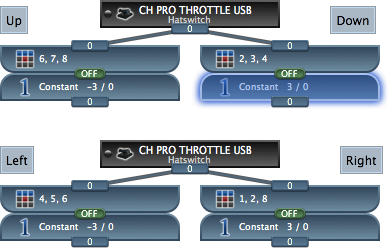
Next, add a Constant Number building block to each Value Selector block.
The Constant Number blocks for the "Up" and "Left" directions are setup to generate a negative number when their inputs are turned ON, and "0" when their inputs are turned OFF.
The Constant Number blocks for the "Down" and "Right" directions are setup to generate a positive number when their inputs are turned ON, and "0" when their inputs are turned OFF.

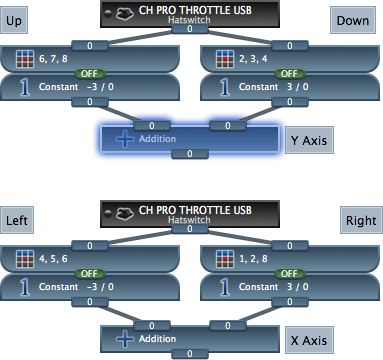
Next, add an Addition building block to combine the "Up" and "Down" values into a single "Y-Axis" value, and another to combine the "Left" and "Right" values into a single "X-Axis" value.
At this point, move the hatswitch to its center position and verify that the output values of the Addition building blocks are both "0". If the blocks have any other output value, the cursor will move on the screen when the virtual mouse is attached. In the worst case, the cursor could be uncontrollable.
If the output value of either Addition block is not "0" when the hatswitch is centered, double-check the settings of the Value Selector and Constant Number blocks as described above before connecting the virtual mouse.
The next step is to connect the virtual mouse to the Addition building blocks.
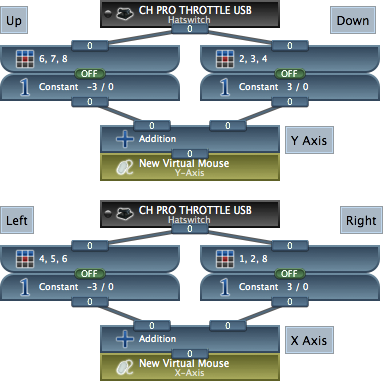
Create Virtual Axis building blocks for the X-Axis and Y-Axis on the virtual mouse and connect them to the corresponding Addition building block.
At this point, moving the hatswitch on the CH Pro Throttle USB should cause the cursor to move on the screen. Just as importantly, when the hatswitch is released, the cursor should stop moving.
If the cursor is too slow or too fast when the hatswitch is pushed, then the speed of the cursor can be adjusted by changing the values in the Constant Number building blocks. Larger numbers will cause the cursor to move faster, smaller numbers will cause the cursor to move slower. The Constant Number blocks should always be configured to generate "0" when their inputs are OFF.
Unlike the Joystick Mouse example, using the hatswitch to control the cursor produces constant speed cursor movement. As a result, there is little benefit to adjusting the cursor speed using a Driver Configuration.
In addition to controlling the cursor with the mini-joystick, the CH Pro Throttle USB can also be configured to trigger buttons on the virtual mouse.
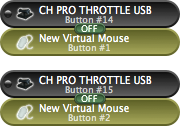
Create Button building blocks for two of the buttons on the CH Pro Throttle USB.
Connect Virtual Button building blocks for Button #1 and Button #2 on the virtual mouse.
At this point, the CH Pro Throttle USB can be used to control the axes and buttons of the virtual mouse.