
Detailed Tutorial
This tutorial demonstrates how to setup ControllerMate to generate keyboard commands in response to controls on a generic gamepad. It assumes that the reader is starting up ControllerMate for the first time and is not familiar with the interface.
This sample is based on commands that may commonly be used with a gaming device, but the majority of this tutorial is applicable to arbitrary keyboard commands that may be triggered by any generic device with buttons.
Commands
The commands that this sample will generate are those that might be used in a common first-person shooter game. The following are the keyboard keys that will be generated and the hypothetical function that they perform:
| Keyboard Key | Command |
|---|---|
| W | Move Forward |
| A | Move Left |
| S | Move Backward |
| D | Move Right |
| Q | Lean Left |
| E | Lean Right |
| Keypad 8 | Look Forward |
| Keypad 4 | Look Left |
| Keypad 6 | Look Right |
| Keypad 2 | Look Backward |
Controller
This tutorial triggers keyboard commands in response to activity from controls on a Logitech RumblePad 2 gamepad. It uses five of the controller's buttons and its hatswitch (8-way directional control). The RumblePad has four buttons under the right thumb (Buttons #1-#4), one button on the right-front (Button #6), and a hatswitch under the left thumb. Buttons #1-#4 will be used for the Move and Lean commands and the hatswitch will be used for the Look commands. Button #6 will be used to alter the command that is generated by Buttons #1 and #3.
| Keyboard Key | Command | Controller |
|---|---|---|
| W | Move Forward | Button #4 |
| A | Move Left | Button #1 |
| S | Move Backward | Button #2 |
| D | Move Right | Button #3 |
| Q | Lean Left | Button #6 + Button #1 |
| E | Lean Right | Button #6 + Button #3 |
| Keypad 8 | Look Forward | Hatswitch Up |
| Keypad 4 | Look Left | Hatswitch Left |
| Keypad 6 | Look Right | Hatswitch Right |
| Keypad 2 | Look Backward | Hatswitch Down |
Buttons #1 and #3 will each trigger two keyboard commands, one command when Button #6 is also pressed and another when Button #6 is not pressed.
Preparation
In this tutorial, keyboard commands are generated by ControllerMate using its Building Blocks. Building blocks need to be created on Pages, so the first task is to create two new pages.
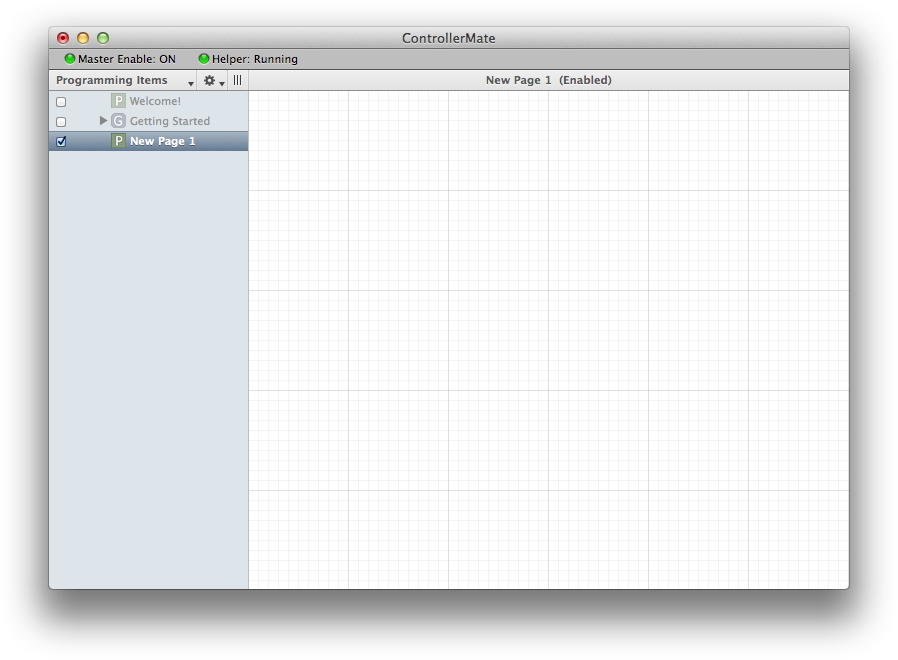
In ControllerMate's Editor window, select Programming Items in the menu at the top of the list of items along the left side of the window.
Then right-click within the list of programming items and select Create Programming Page from the popup menu.
A new blank page named "New Page 1" will appear in the list of programming items.
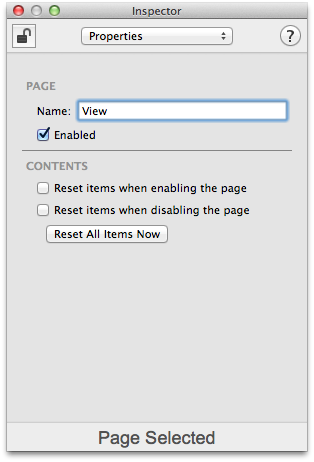
With the "New Page 1" item selected in the Editor window, change the name of the page to "View" in the Inspector window. If an Inspector window is not open, select Window ‣ Inspector Window ‣ New Inspector from the menu bar, or use Command-i to open a new Inspector window.
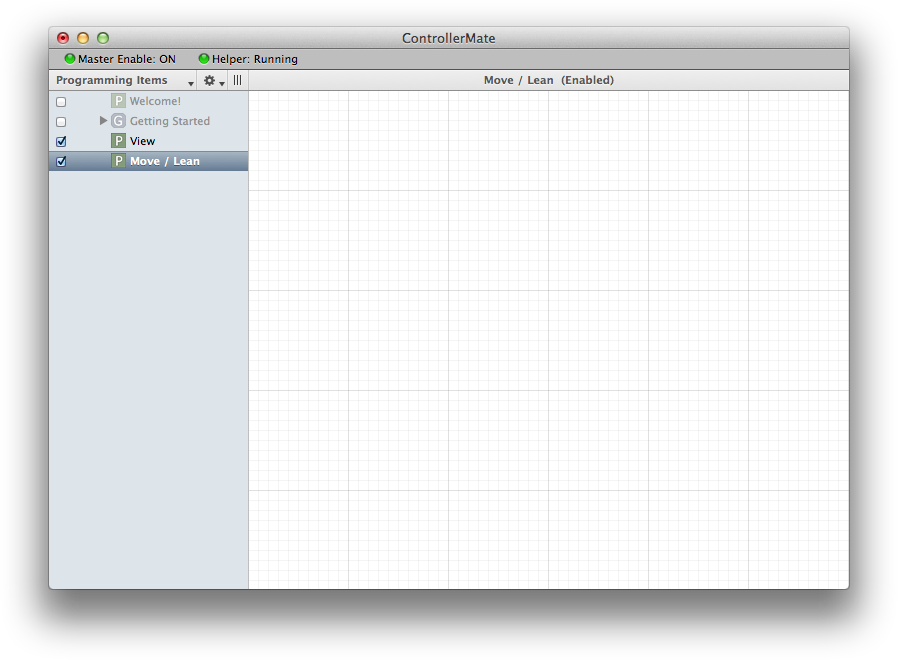
Using this same technique, create a second page and give it the name "Move / Lean".
"Move" Commands
This tutorial uses ControllerMate's building blocks to generate keyboard activity in response to a button. For each keyboard command, a Button building block is used to respond to the controller's button, and a Single Key block is used to generate the keyboard output.
The first command that will be implemented is the "Move Forward" command ("W" key) triggered by Button #4.
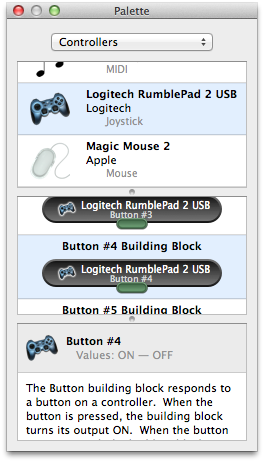
In ControllerMate's Palette window, select Controllers from the popup menu at the top of the window. The "Controllers" view displays the controllers that ControllerMate currently sees along with the controls found on those devices.
In the top section of the Palette window, locate the Logitech RumblePad 2 and click on it. The center section of the Palette window will then show the controls found on the RumblePad.
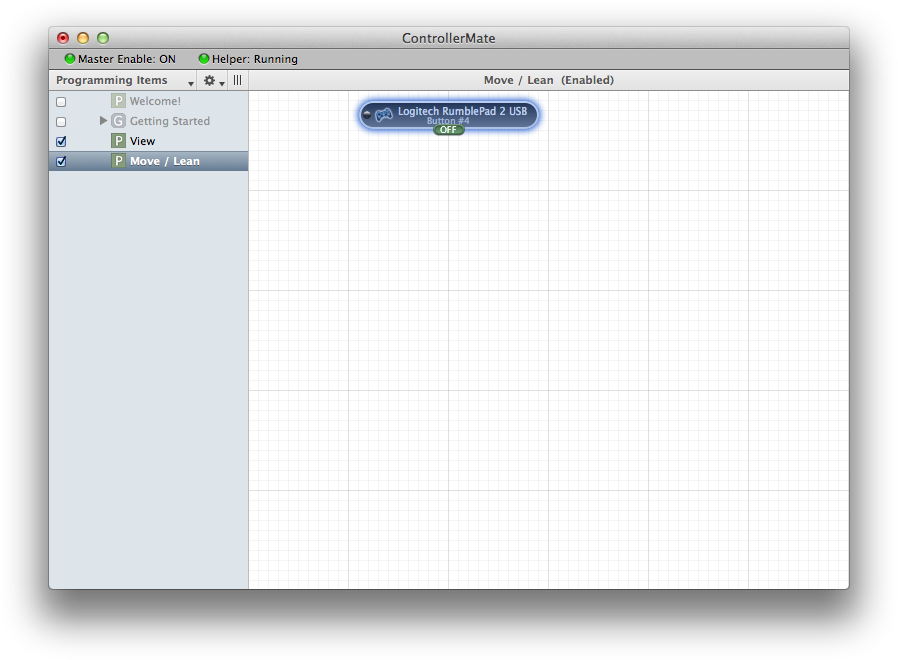
Drag a building block for Button #4 from the Palette window to the Editor window and drop it on the "Move / Lean" page.
When Button #4 is pushed on the RumblePad, the output of the newly created building block will turn ON.
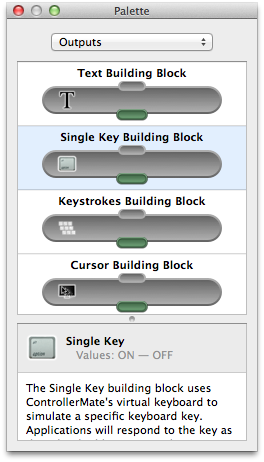
The next step is to create a Single Key building block that will be triggered by Button #4 and will generate the "W" key.
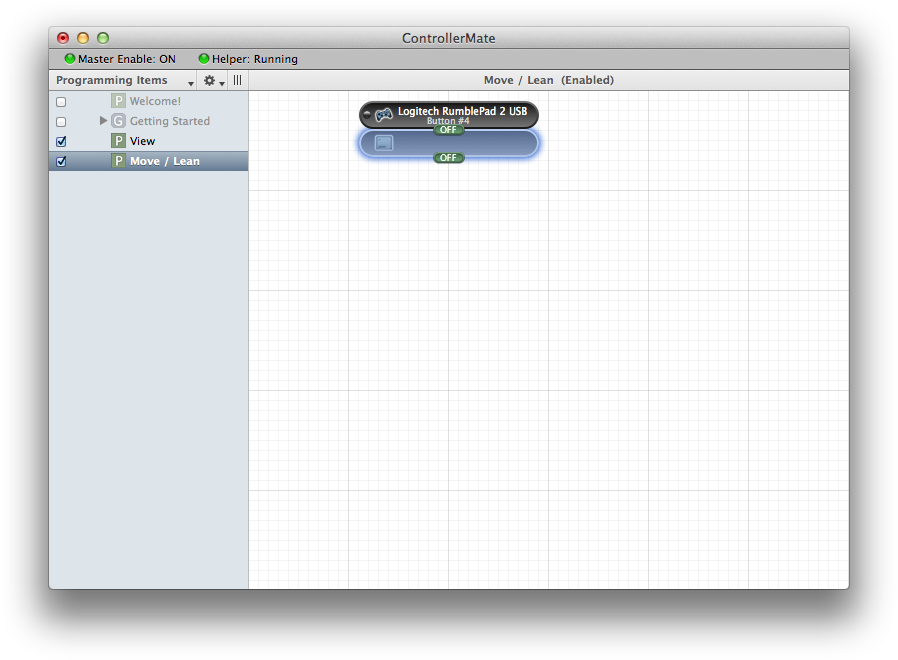
In ControllerMate's Palette window, select Output from the popup menu at the top of the window.
Drag a Single Key building block from the Palette window to the "Move / Lean" page and position it immediately below the building block for Button #4.
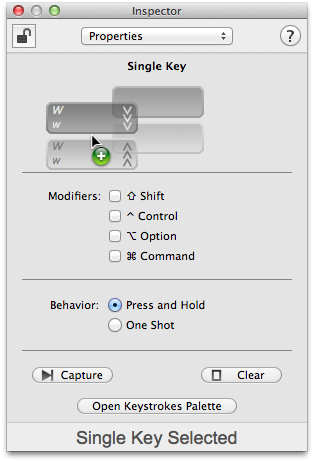
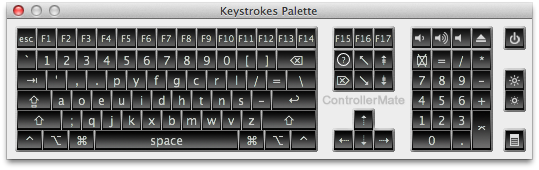
In the Inspector window, click the Open Keystrokes Palette button.
Drag the "W" key from the Keystrokes Palette window and drop it on the Inspector window. This configures the Single Key building block to generate the "W" key.
At this point, when Button #4 is pressed on the RumblePad, the building blocks will generate "W" on ControllerMate's virtual keyboard.

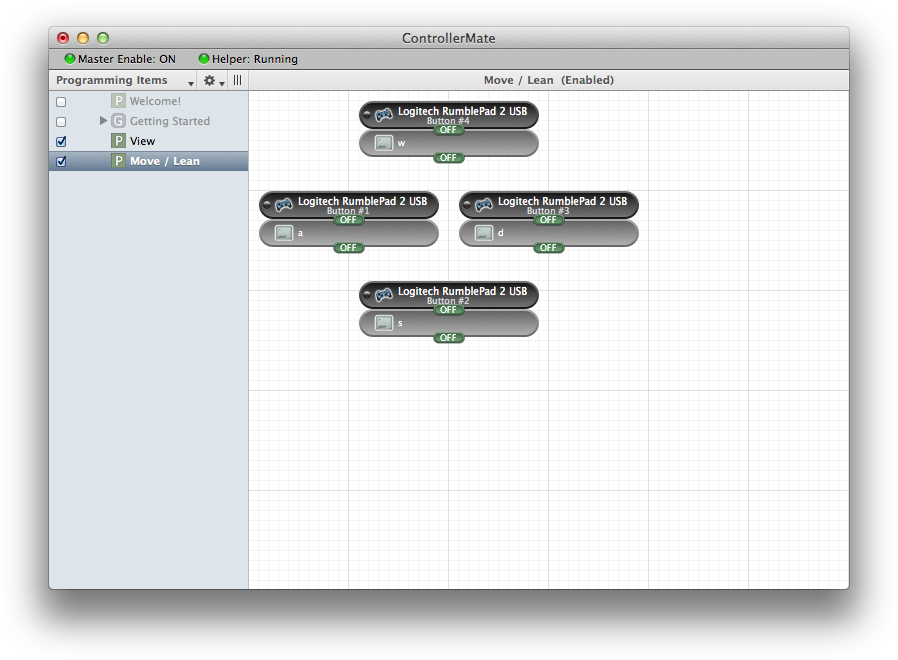
Using the same procedure described above, create Button building blocks for buttons #1, #2, and #3. Attach a Single Key block to each and configured them to generate the "A", "D", and "S" keys for the the remaining move commands.
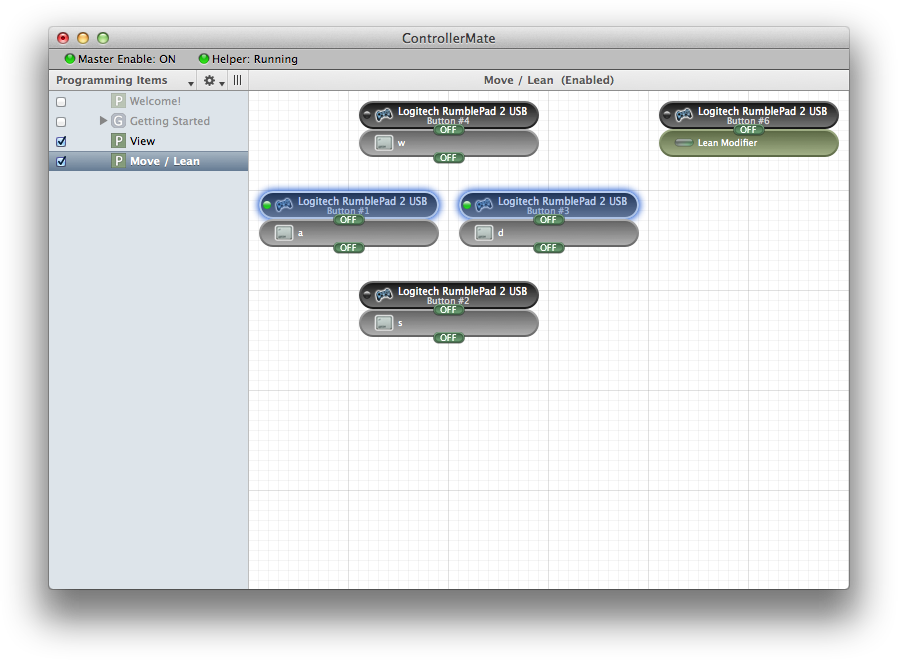
The last step for the "Move" commands is to setup the building blocks for Buttons #1 and #3 to respond only when Button #6 is not pressed. This is done by creating a modifier that is triggered by Button #6, then configuring the blocks for Buttons #1 and #3 to respond only when that modifier is OFF.
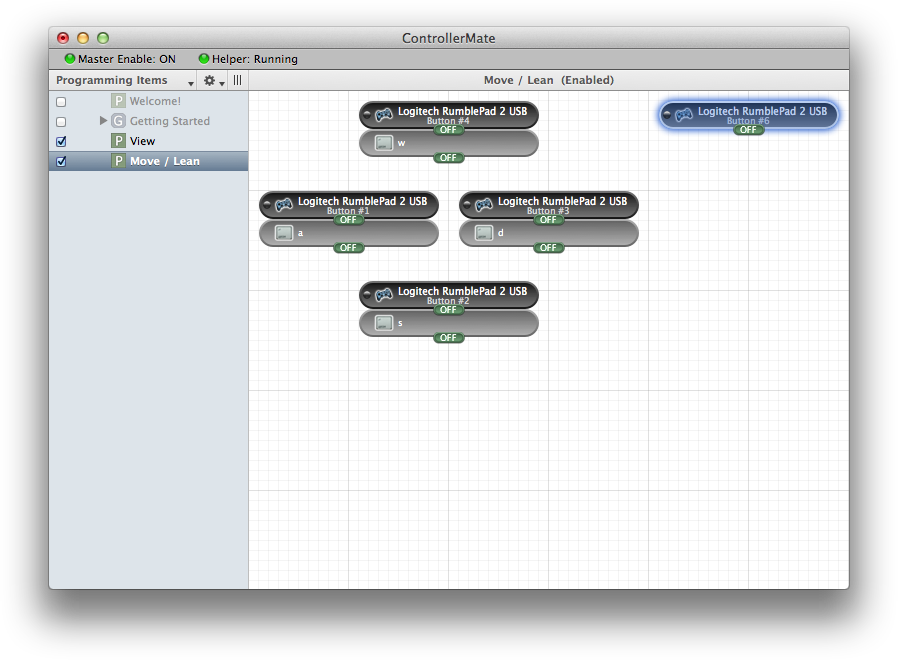
Create a building block for Button #6 on the "Move / Lean" page.
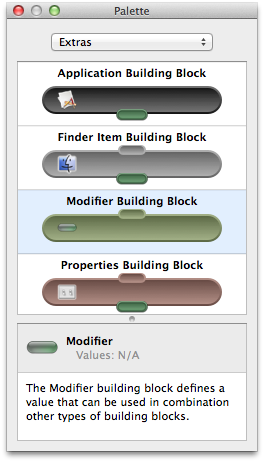
In ControllerMate's Palette window, select Extra from the popup menu at the top of the window.
Drag a Modifier building block from the Palette window to the "Move / Lean" page and position it immediately below the building block for Button #6.

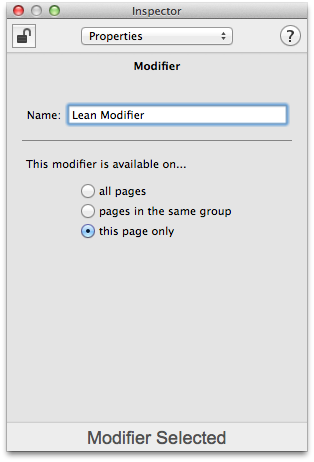
In the Inspector window, change the name of the modifier to "Lean Modifier".
Next, select the building blocks for Button #1 and Button #3 to configure them both at the same time.
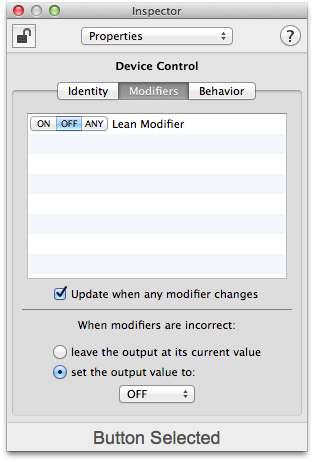
In the Inspector window, select the Modifiers tab.
Change the control next to the "Lean Modifier" item to OFF.
After this change is made, the dot in the left end of the building blocks will change from black to green. The color of the dot indicates whether the block's modifiers have the correct value.
Green indicates that the block's modifiers have the correct value.
Red indicates that the modifiers have an incorrect value.
Black indicates that the block does not depend on modifier values.
"Lean" Commands
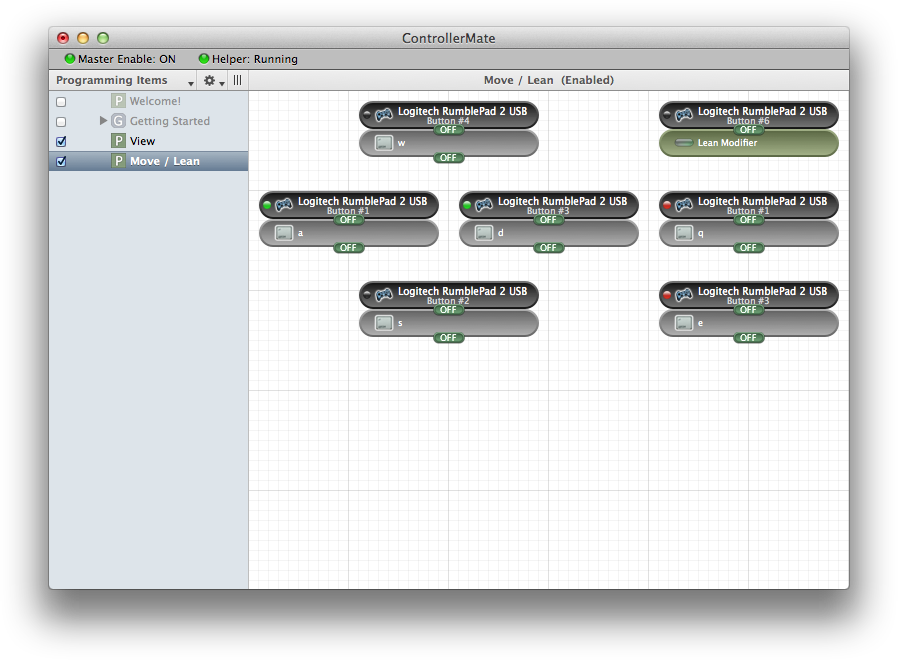
The last two commands that will be added to the "Move / Lean" page are the "Lean Left" ("Q" key) and "Lean Right" ("E" key) commands.
Each of the "Lean" commands is implemented with a Button building block and a Single Key building block using the techniques described in the sections above.
The building blocks for Button #1 and Button #3 that trigger the "Lean" commands will be setup to require the "Lean Modifier" to be ON. This prevents these blocks from responding unless Button #6 is also pressed.
After the "Lean" commands have been setup, pressing Button #6 on the RumblePad will cause the dots on the building blocks for Buttons #1 and #3 to switch between green and red to show which blocks currently respond to their respective buttons.
"Look" Commands
The "Look" commands will be triggered by the hatswitch on the RumblePad. The values that the hatswitch generates for each position can be determined by creating a Hatswitch building block, then observing the block's output value for each hatswitch position. The hatswitch on this device generates the following values:
| Hatswitch Position | Hatswitch Value |
|---|---|
| Up | 0 |
| Up-Right | 1 |
| Right | 2 |
| Down-Right | 3 |
| Down | 4 |
| Down-Left | 5 |
| Left | 6 |
| Up-Left | 7 |
| Center | 8 |
The keyboard keys for each of the "Look" commands will be triggered by the following hatswitch values:
| Command | Keyboard Key | Hatswitch Values |
|---|---|---|
| Look Forward | Keypad 8 | 0, 1, 7 |
| Look Backward | Keypad 2 | 3, 4, 5 |
| Look Left | Keypad 4 | 5, 6, 7 |
| Look Right | Keypad 6 | 1, 2, 3 |
Similar to the "Move" and "Lean" commands, the "Look" commands will be generated by Single Key building blocks. However, the Single Key block cannot be connected directly to a Hatswitch building block. The Single Key block requires an ON/OFF value and the Hatswitch produces a Number value. To convert one type of value to the other, Value Selector building blocks will be used to identify which values should trigger each Single Key block.
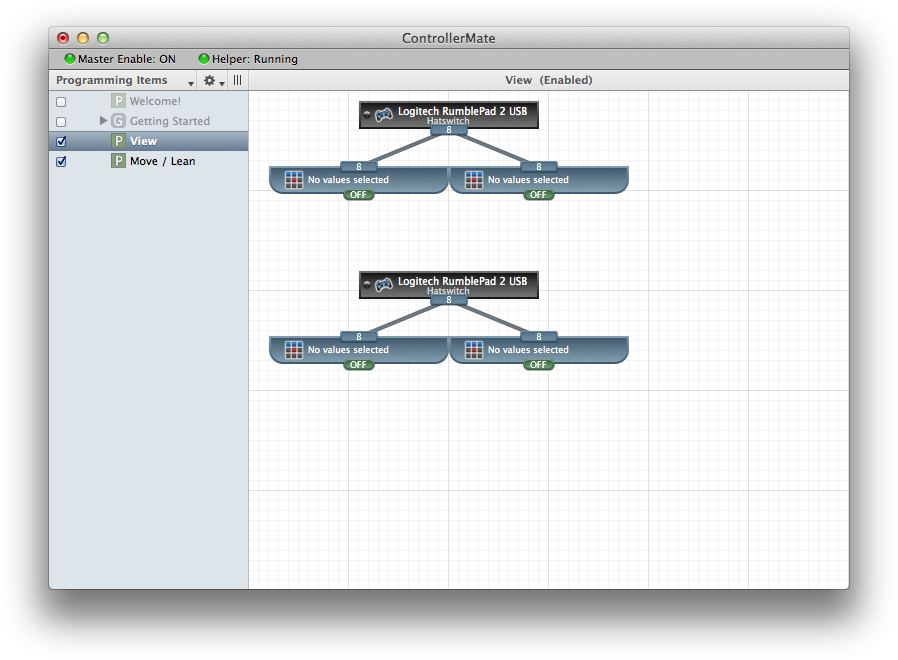
The first step is to create two Hatswitch building blocks. Hatswitch blocks are found in the Controllers view of the Palette window along with the Button building blocks.
Next, create four Value Selector building blocks, one for each of the keyboard keys that needs to be generated. Values Selector building blocks can be found in the Calculations section of the Palette window.
Building blocks that are not located directly above and below each other can be connected by dragging the output from one building block to the input of another. A block can be connected to multiple others by dragging additional connections from the output of one building block to the input of another.
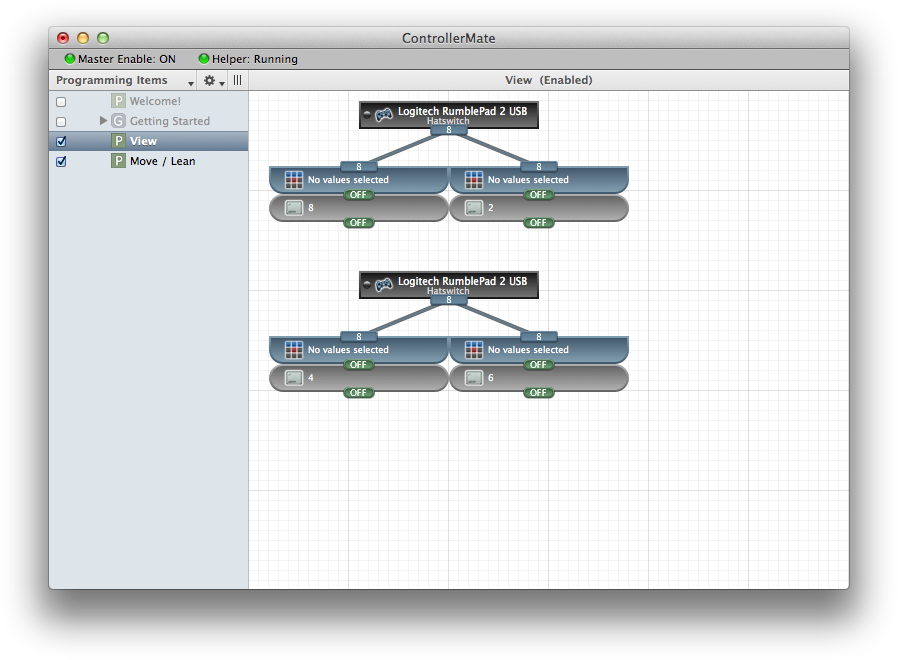
The next step is to create four Single Key building blocks and configure them with the four individual "Look" command keys.
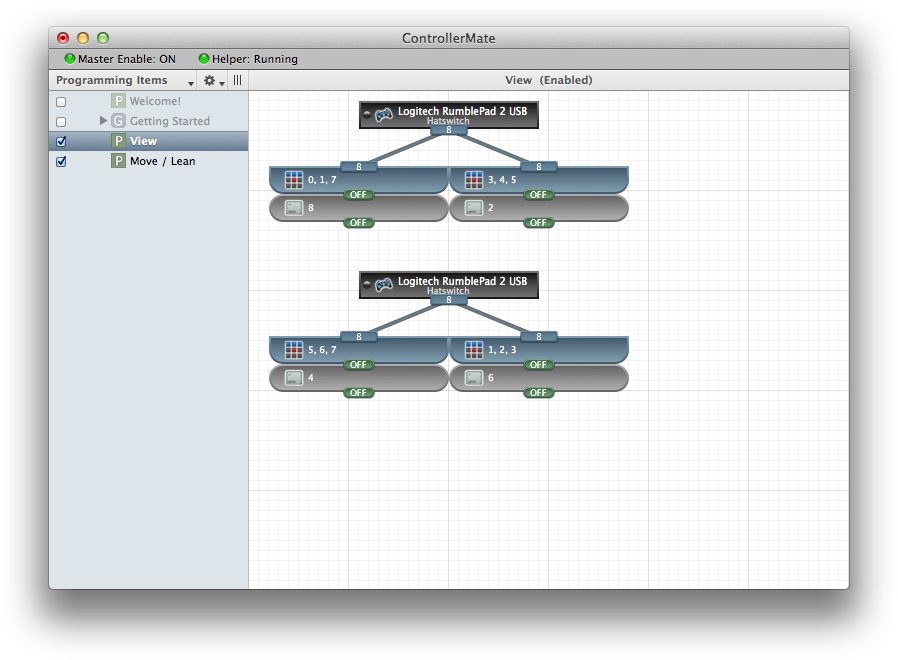
The last step is to configure each of the Value Selector building blocks with the values that need to trigger each of the "Look" commands.

Value Selector building blocks are configured in the Inspector window by selecting the individual values that should cause the output of the block to turn ON. If the Value Selector receives any other value, it will turn its output OFF.
The Value Selector block that triggers the "Look Forward" ("Keypad 8" key) command turns ON when it receives a value of 0, 1, or 7 from the hatswitch. These values correspond to the "Up" direction of the hatswitch as well as the "Up-Left" and "Up-Right" diagonal directions.
The remaining Value Selector building blocks are each configured with the three hatswitch values that trigger the corresponding "Look" command.
At this point, when the hatswitch is pushed in a particular direction, the corresponding keypad number will appear in the Output window. Since the Output window is similar to a simple TextEdit window, it shows output only from the most recently simulated key. To see the operation of the diagonal directions of the hatswitch, open the OS X Keyboard Viewer to view which keys are being generated by ControllerMate.
Summary
This tutorial explained the basic technique of configuring building blocks to trigger activity on ControllerMate's virtual keyboard based on events from a controller. It used only four of the more than 60 different types of building blocks that ControllerMate provides. The remaining building blocks all follow the same basic principle, they each implement a basic function that can be combined with other building blocks to implement more sophisticated behavior.